 Ducati Scrambler 800 - Service manual > Refitting the rear brake disc
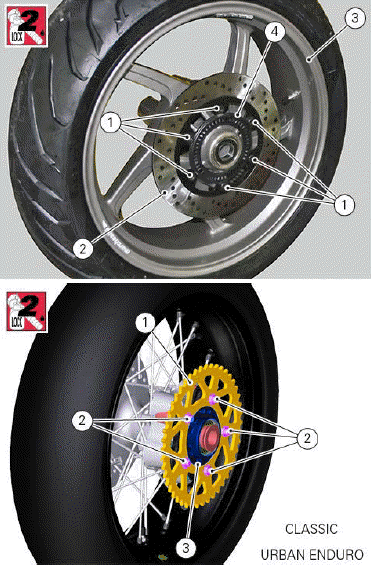
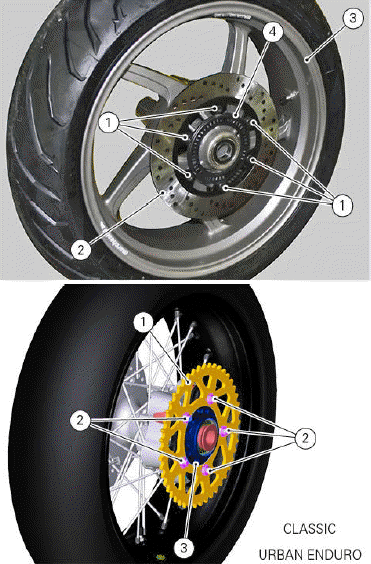
Position brake disc (2) on wheel (3) and the phonic wheel (4) on the disc.
Tighten the screws (1) with pre-applied threadlocker to a torque of 25 Nm +- 5%, in a cross pattern.
Removing the rear brake disc
Remove the rear wheel (Removing the rear wheel).
Loosen and remove screws (1) retaining the brake disc (2) to wheel (3).
Remove the phonic wheel (4).
Refitting the rear brake calliper
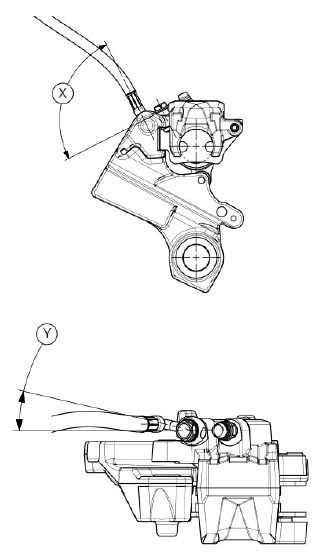
Warning If incorrectly positioned, hoses can affect brake operation and foul moving parts. Position the component as shown in the figure.
X=90Âş
Y=13Âş
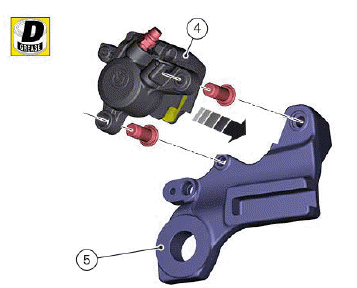
Lubricate the two pins with the recommended product.
Insert calliper (4) in calliper holder (5).
Fit the rear wheel (Refitting the rear wheel).
Tighten special screw (1) with the two seals (3) to a torque of 23 Nm +- 10%.
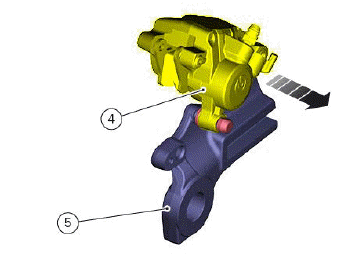
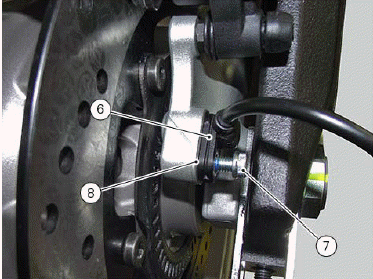
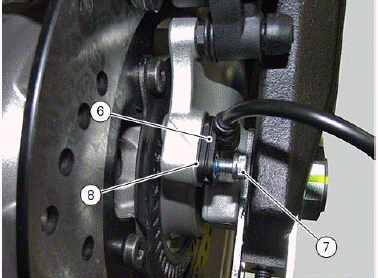
If previously removed, fit speed sensor (6) with spacer (8) and tighten screw (7) to a torque of 7 Nm +- 10%.
Check the Air-Gap (Adjusting the phonic wheel sensor AIR-GAP).
Removing the rear brake calliper
Warning The brake master cylinder manufacturer advises against servicing the brake master cylinder due to the safety critical nature of this component. Incorrect overhaul can endanger rider and passenger safety.
Maintenance operations on these units are limited to replacement of the following parts: control lever, fluid reservoir assembly and relative fasteners and master cylinder fasteners.
Drain the rear braking system (Changing the rear brake system fluid).
Loosen special screw (1) without removing it.
Remove the rear wheel (Removing the rear wheel).
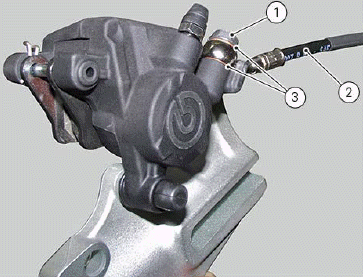
Undo and remove the special screw (1) securing the hose (2) to the rear brake calliper and the corresponding seals (3).
Remove the hose (2).
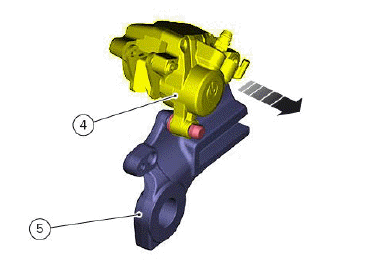
Slide out calliper (4) from calliper holder (5).
To replace the brake pads follow instructions in the paragraph "Checking brake pad wear and replacing rear brake pads".
To remove the speed sensor (6), undo the fastening screw (7) paying attention to the spacer defining the airgap (8).
Refitting the rear brake control
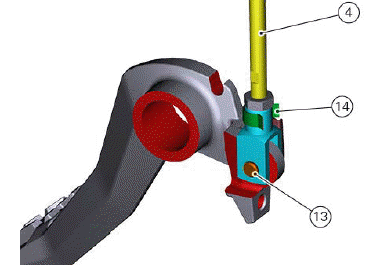
If previously removed, fit the activation rod (4) by fixing it with pin (13).
Lock shaft using retainer (14).
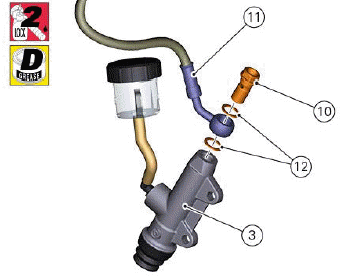
Reconnect hose (11), locating seals (12) on both sides of the hose union, and secure it with the special screw (10).
Tighten the special screw (10) to a torque of 23 Nm +- 10%.
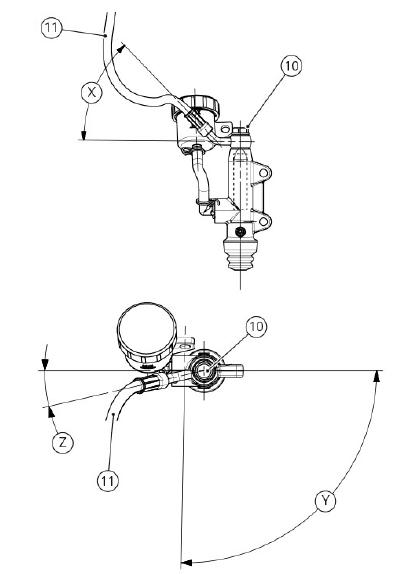
Note Pay particular attention to the hose routing and hose coupling on the rear brake master cylinder
X=46Âş
Y=91Âş
Z=13Âş
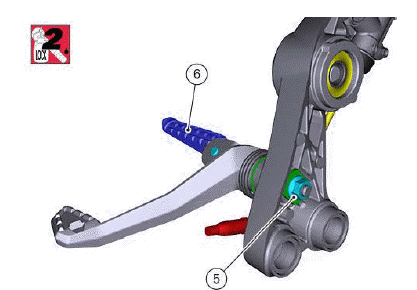
Fit washer (15) on the footpeg holder plate (8).
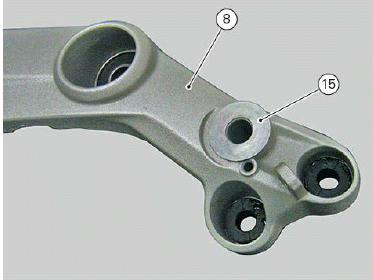
Fit spring (9) by inserting its end in the seat on the footpeg holder plate (8).
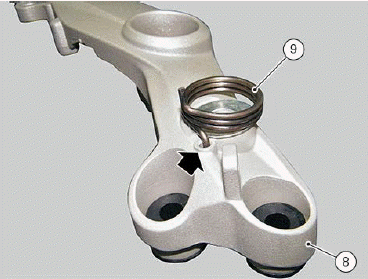
Fit footpeg (6) into lever (7).
Grease O-ring (16) with indicated product.
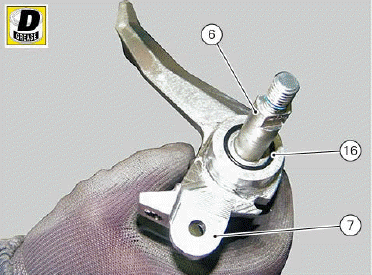
Insert the footpeg/brake lever assembly in footpeg holder plate (8).
Engage spring end (9) in the recess on the brake lever (7).
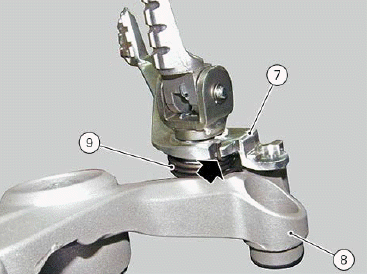
Apply the specified threadlocker and tighten nut (5) to a torque of 22 Nm +- 5%.
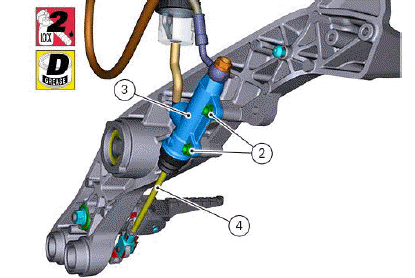
Apply the recommended threadlocker on the screws (2).
Position the rear brake master cylinder (3) on the vehicle inserting the retaining screws (2).
Insert the rod (4) inside the master cylinder (3), after applying the recommended grease.
Tighten screws (2) to a torque of 10 Nm +- 10%.
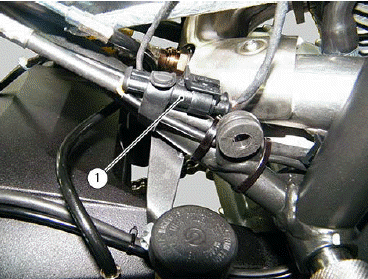
Connect rear stop switch (1) to main wiring.
Fill the rear braking system (Changing the rear brake system fluid).
See also:
 Ducati Scrambler 800 - Service manual > Disassembling the rear brake control
The brake master cylinder is supplied only as a complete unit; internal components cannot be replaced. To disassemble the master cylinder's outer parts, follow the indications given in the exploded view at the beginning of this Section.
 Ducati Scrambler
 Fantic Caballero 500
 Indian FTR 1200
 Moto Guzzi V85 TT
 Royal Enfield Bullet Trials Works Replica
 Triumph Scrambler 1200 XE
 Triumph Street Scrambler
 Yamaha XSR700
 Ducati Scrambler 800
 Moto Guzzi V85 TT
 Triumph Scrambler 1200 XC