 Moto Guzzi V85 TT - Service manual > Front fork


Removing the fork legs
The following procedure is described for a single fork stanchion, but is valid for both stanchions.
- Remove the front mudguard
- Remove the front wheel
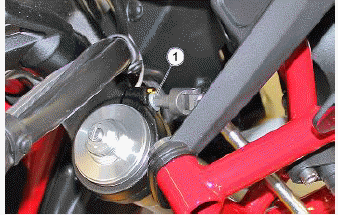
- Loosen the screw (1)
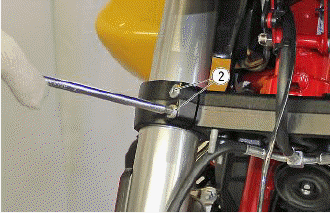
- Loosen the two screws (2)
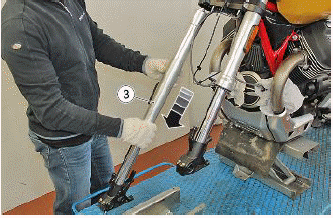
- Remove the fork stanchion (3)
Disassembling the fork
NOTE THE STEMS ARE NOT THE SAME, THEREFORE THEY REQUIRE SEPARATE REMOVAL PROCEDURES.
THE FOLLOWING OPERATIONS APPLY WHEN REMOVING THE RIGHT HAND STEM
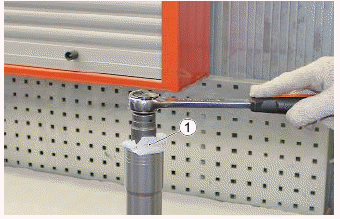
- Taking care not to damage it, secure the fork vertically in a vice, using the appropriate protection devices.
- Unscrew the upper cap (1).
Specific tooling
AP8140149 Guard for assembly operations
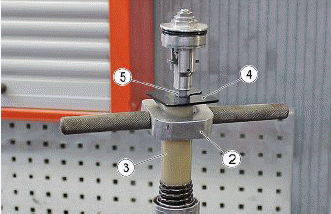
- Using the special tool (2), fastened to the pre-loading pipe (3), compress the spring and, with the assistance of a second operator, insert the separator plate (4) under the cap retaining nut (5).
Specific tooling
020888Y Preload tube clamp AP8140148 Plunger-spacer separator plate
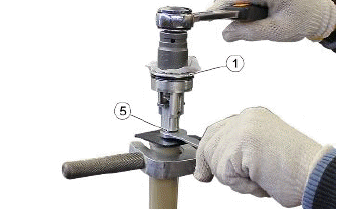
- Ensure that the cap (1) cannot rotate, and then loosen the nut (5).
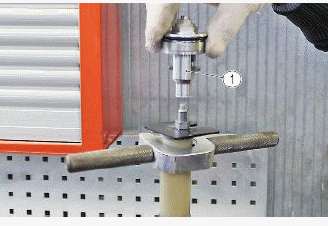
- Unscrew and remove the cap (1).
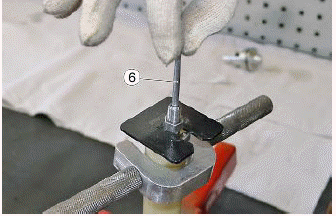
- Extract the shaft (6) and remove it.
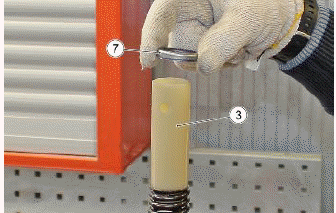
- After removing the locking plate and the device used to compress the spring, remove the upper plate (7) and the pre-loading pipe (3).
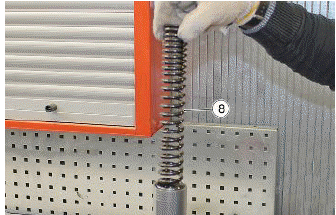
- Remove the spring (8) allowing the oil inside the stem to drip out.
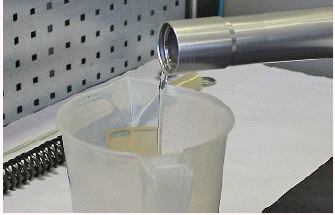
- Drain the oil into a container having sufficient capacity, extending the stem several times in order to ensure the oil is drained completely.
DO NOT DISPOSE OF OIL INTO THE ENVIRONMENT.
DISPOSE OF ENGINE OIL IN A SEALED CONTAINER AND TAKE IT TO YOUR SUPPLIER OR TO THE NEAREST USED OIL COLLECTION CENTRE.
- Taking care not to damage it, secure the sleeve horizontally in a vice, using the appropriate protection devices.
- Extract the dust guard (9).
See also:
 Moto Guzzi V85 TT - Service manual > Specific tooling
AP8140149 Guard for assembly operations Remove the seeger ring (10) from inside the sleeve. Pull the stem repeatedly towards yourself in order to remove it from the sleeve. Secure the stem in a vice and remove the plunger fastening screw (11), taking care not to lose the copper washer (12). Remove the complete plunger (13). Observing the indicated sequence, extract and remove the slider bushing (14), the guide bushing (15), the ring (16), the oil seal (17), the seeger ring (10) and the dust guard (9).
 Ducati Scrambler
 Fantic Caballero 500
 Indian FTR 1200
 Moto Guzzi V85 TT
 Royal Enfield Bullet Trials Works Replica
 Triumph Scrambler 1200 XE
 Triumph Street Scrambler
 Yamaha XSR700
 Ducati Scrambler 800
 Moto Guzzi V85 TT
 Triumph Scrambler 1200 XC