 Moto Guzzi V85 TT - Service manual > Checking the components
Stem
Check that the sliding surface is not scratched or scored.
Any scoring can be removed by sanding with damp sandpaper (grain 1).
If the scratches are deep, replace the stem.
Using a dial gauge, check than any bending of the stem is below the limit value.
If it is over the limit, replace the stem.
CAUTION A BENT STEM SHOULD NEVER BE STRAIGHTENED SINCE ITS STRUCTURE WOULD BE WEAKENED MAKING THE VEHICLE DANGEROUS TO USE.
Characteristic
Bending limit: 0.2 mm (0.00787 in)
Sleeve
Check for damage and/or cracks; if it is damaged, replace it.
Spring
Check the condition of the spring, making sure that the length is within the acceptable limits.
If not, replace the spring.
MINIMUM LENGTH OF FREE SPRING: ... mm (... in)
Check the condition of the following components:
- slider bushing;
- guide bushing;
- plunger.
If there is evidence of excessive wear or damage, replace the component concerned.
CAUTION REMOVE ANY IMPURITIES FROM THE BUSHINGS, BEING CAREFUL NOT TO SCRATCH THEIR SURFACES.
Replace the following components with new ones:
- Oil seal.
- Dust guard.
- O-ring on the cap.
Reassembling the fork
CAUTION THE STEMS ARE NOT THE SAME, THEREFORE THEY REQUIRE SEPARATE MOUNTING PROCEDURES.
THE FOLLOWING OPERATIONS APPLY WHEN MOUNTING THE RIGHT HAND STEM
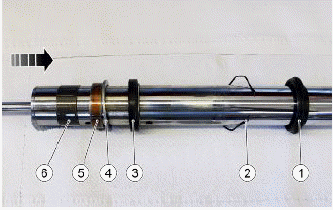
- Observing the indicated sequence, extract and remove the dust guard (1), the seeger ring (2), the oil seal (3), the ring (4), the guide bushing (5) and the slider bushing (6).
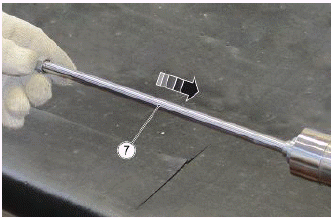
- Insert the complete plunger (7).
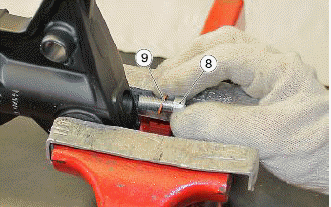
- Secure the stem in a vice and, after inserting the screw (8) used to fasten the plunger, complete with the copper washer (9), apply the pre-defined tightening torque.
- Insert the stem in the sleeve.
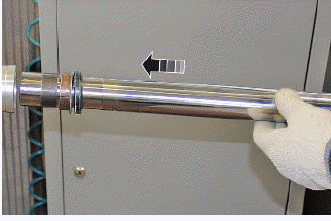
- Using a suitable tool, complete with striking hammer, insert oil seal into its housing (3).
Specific tooling
AP8140189 Tool for fitting oil seal for 43 mm (1.69 in) diameter hole AP8140146 Weight
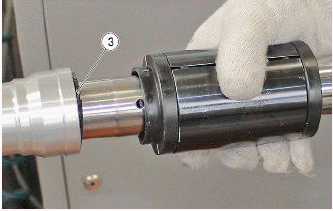
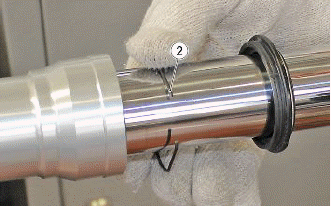
- Position the seeger ring (2) inside the sleeve.
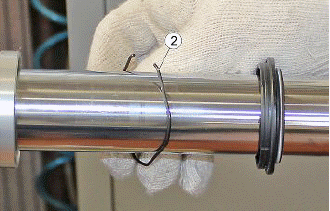
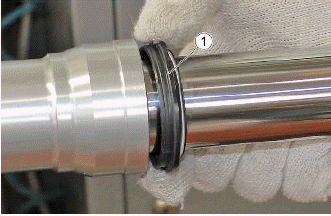
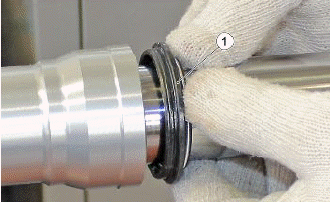
- Insert the dust guard (1) into its housing correctly.
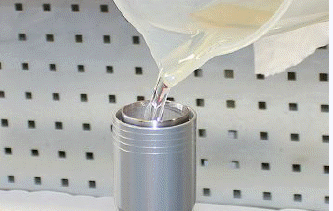
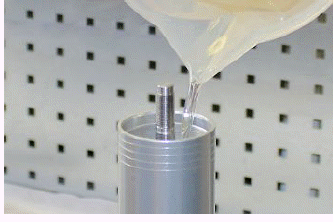
- Place the fork stem vertically on a work surface.
- Fill the stem with the quantity of oil indicated in the "Refilling oil" section.
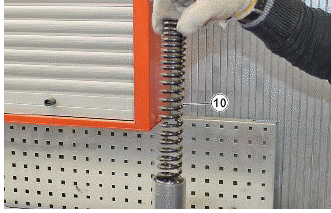
- Insert the spring (10), making sure that it is aligned correctly The end where the spirals are more compressed should be facing upwards
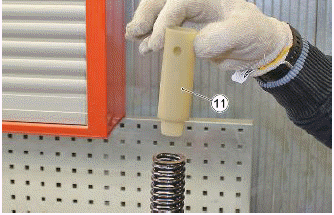
- Insert the pre-load tube (11), making sure that it is aligned correctly. The narrower part must be inserted into the spring.
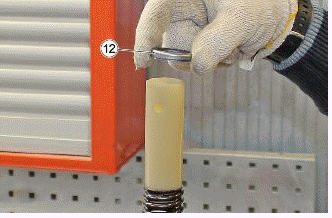
- Insert the upper plate (12) on the preload pipe
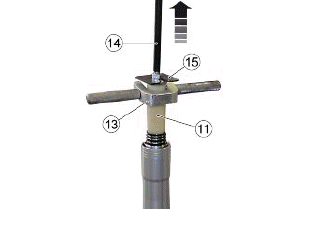
- After positioning the device (13) on the pre-load pipe (11) and the plunger support shaft (14), with the assistance of a second operator, raise the plunger so that it is possible to insert the plate (15) under the cap locking nut.
Specific tooling
020888Y Clamp for pre-load pipe AP8140150 Bored shaft for bleeding plunger air AP8140148 Plunger-spacer separator plate
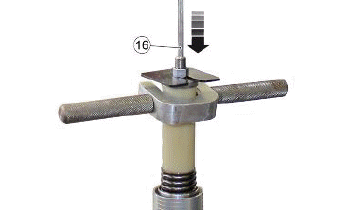
- Insert the shaft (16) into the plunger.
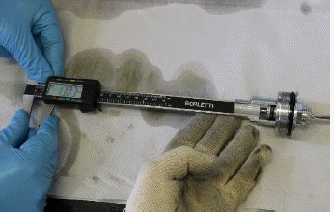
- Before positioning the cap, adjust the hydraulic regulator screw so that the internal distance is as close as possible to 13 mm (0.51 in).
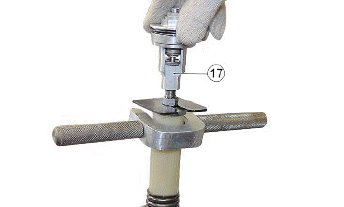
- Screw the cap (17) onto the plunger as far as it will go.
- Ensure that the cap cannot rotate, and then tighten the nut.
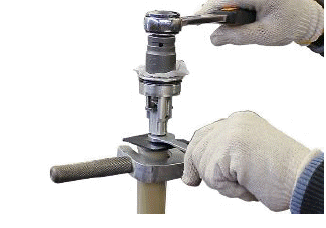
- Tighten the cap on the sleeve, applying the pre-defined torque.
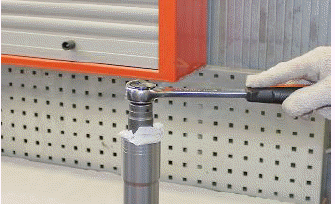
THE FOLLOWING OPERATIONS APPLY WHEN MOUNTING THE LEFT HAND STEM
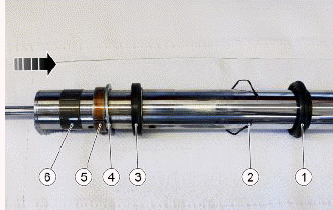
- Observing the indicated sequence, extract and remove the dust guard (1), the seeger ring (2), the oil seal (3), the ring (4), the guide bushing (5) and the slider bushing (6).
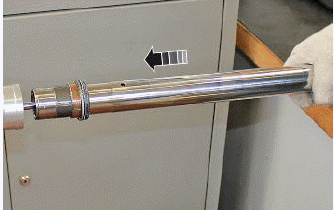
- Insert the stem in the sleeve.
- Using a suitable tool, complete with striking hammer, insert oil seal into its housing (3).
Specific tooling
AP8140189 Tool for fitting oil seal for 43 mm (1.69 in) diameter hole AP8140146 Weight
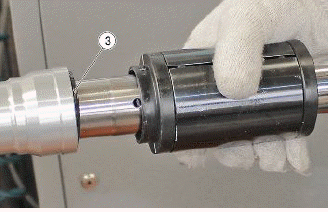
- Position the seeger ring (2) inside the sleeve.
- Insert the dust guard (1) into its housing correctly.
- Place the fork stem vertically on a work surface.
- Fill the stem with the quantity of oil indicated in the "Refilling oil" section.
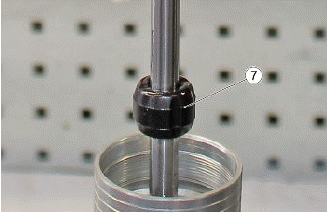
- Insert the buffer (7).
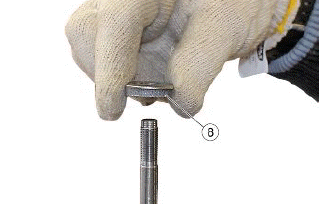
- Insert the special nut (8) and tighten it as far as it will go.
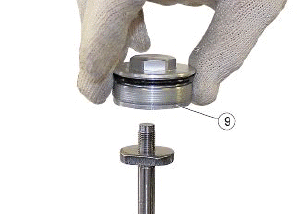
- Insert the cap (9) and tighten it as far as it will go.
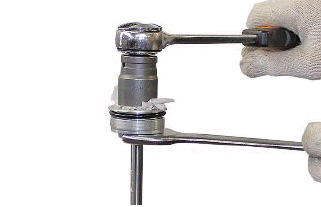
- Ensure that the cap cannot rotate, and then tighten the nut.
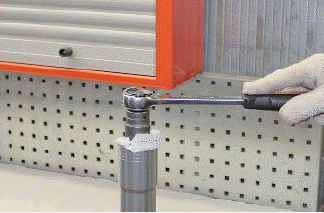
- Tighten the cap on the sleeve, applying the pre-defined torque.
See also:
 Moto Guzzi V85 TT - Service manual > Specific tooling
AP8140149 Guard for assembly operations Remove the seeger ring (10) from inside the sleeve. Pull the stem repeatedly towards yourself in order to remove it from the sleeve. Secure the stem in a vice and remove the plunger fastening screw (11), taking care not to lose the copper washer (12). Remove the complete plunger (13). Observing the indicated sequence, extract and remove the slider bushing (14), the guide bushing (15), the ring (16), the oil seal (17), the seeger ring (10) and the dust guard (9).
 Moto Guzzi V85 TT - Service manual > Filling oil
THE FOLLOWING OPERATIONS APPLY WHEN MOUNTING THE RIGHT HAND STEM Place the fork stem vertically on a work surface. Fill the STEM with the indicated quantity of oil.
 Ducati Scrambler
 Fantic Caballero 500
 Indian FTR 1200
 Moto Guzzi V85 TT
 Royal Enfield Bullet Trials Works Replica
 Triumph Scrambler 1200 XE
 Triumph Street Scrambler
 Yamaha XSR700
 Ducati Scrambler 800
 Moto Guzzi V85 TT
 Triumph Scrambler 1200 XC